A brine shrimp hatchery is a simple, but useful device that helps you hatch, isolate and harvest artemia nauplii, which you then use to feed the fish, corals and other invertebrates in a freshwater or saltwater aquarium.
It’s hard for fish to resist the twitching motion of live foods. It rings the dinner bell in even the pickiest of eaters. The good news is that these days, you can just buy an all-in-one kit with almost everything you need to get started. Just add water.
I also want to share that after testing one of these hatcheries, I have an almost unhealthy obsession with live brine shrimp. It’s so easy to do and my tanks (yes, more than one) are thriving because of it
Let’s review the pros and cons of each of the most popular models, and I’ll share my recommendation for which is the best.
Table of contents
What are brine shrimp?
Brine shrimp, also called artemia, are teeny tiny little creatures that have a few nifty abilities. Brine shrimp cysts can be easily dried out for long periods only to rapidly hatch and spring to life when added to water and given a bit of warmth.
For anyone who owned a Sea Monkeys kit as a kid, you might even have affectionate memories of brine shrimp as a pet. Though many of us might not be entertained by the antics of a shrimp so small you have to squint to get a good look at them, fish are endlessly fascinated by the delicious little shrimp.
For small aquatic organisms of all sorts, brine shrimp provide a source of protein and fatty acids.
Introducing the live, freshly hatched brine shrimp into your aquarium at feeding time also gives all the critters in your tank a very natural and exciting way of getting their calories that closely mimics a natural aquatic environment.
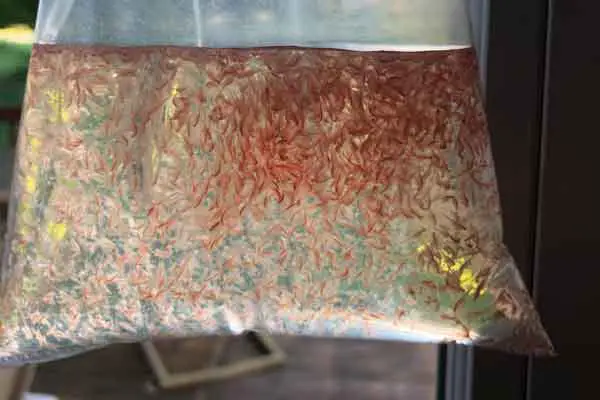
Brine shrimp eggs take around 24-48 hours to hatch, meaning you’re not left waiting long before your investment in the hatchery starts paying dividends. You can feed the shrimp to your fish immediately after they hatch.
Getting the most from your brine shrimp hatchery
I’ll examine a few specific brine shrimp hatchery kits in a moment.
But first, let’s go over a few simple tips that will help you get the most from your brine shrimp hatchery regardless of which kit you decide to go with.
- Keep It Clean: Always wash your hatchery before hatching. Dump out all brine, wash completely, and rinse thoroughly between every use. Never use soap or detergent! Use approved aquarium cleaning products or a light vinegar solution. This prevents the build-up of microorganisms like mold and algae which can cause problems for your shrimp and your tank.
- Keep It Warm: Brine shrimp eggs are most likely to hatch around 82-86° F. At those temperatures, it should take roughly 24 hours for your brine shrimp to start swimming. While they can hatch at temperatures of 70° F or lower, this can take upwards of 36 hours. For best results, shoot for 82° F and never exceed 86° F. In colder climates your hatchery will require a heat source such as a heat lamp.
- Keep It Sparse: Trying to hatch too many eggs at once can lead to wasted shrimp and poor yields. Stick to the manufacturer’s recommended amount of eggs for your hatchery kit.
- Keep It Clear: Always use clean water to hatch your brine shrimp. In most areas, fresh tap water is suitable. However, in some locations with poor water quality, unusual pH, or excessive levels of disinfectant in the water, you may need to filter your tap water or opt for purchasing distilled water to get better results from your hatchery.
Review: In search of the best brine shrimp hatchery and kit:
San Francisco Bay Brand Brine Shrimp Shrimpery

This brine shrimp hatchery kit from San Francisco Bay attempts to simplify the process of hatching your shrimp but may have gone a bit too far. In many ways, this hatchery is more of a toy than a functional part of an aquarium setup, but it can be put to use feeding your fish with a little effort.
Unlike other shrimp hatcheries which rely on an air pump to keep things moving or suggest using a light to attract the shrimp for harvest, this San Francisco Bay kit tries to do everything on its own. Included with the kit is a small tank that serves as the hatchery, a collection jar, and a packet of shrimp eggs and brine.
The hatchery has some dark paneling to keep out light, while the collection jar sits atop it exposed to the light. The idea being that the brine shrimp – who are naturally attracted to light – will swim upwards after hatching. Since the shrimp are swimming up into the freshwater in the collection jar, this also saves you the trouble of rinsing the brine off them before feeding.
When it works, it is a clever and cute design. Unfortunately, many of the little shrimp seem content to languish in the darkness beneath and don’t bother coming up into the collection jar. The lack of any aeration from a pump is also a likely contributor to low hatch rates. Some customers have reported improving yields by adding a light source focused on the collection jar, but overall this kit has very low yields compared to more advanced solutions.
Pros:
- All-in-one setup requires nothing but water
Cons:
- Low Yield
- More of a toy than a tool
Koller Products TOM Aquarium Hatch N’ Feeder Brine Shrimp Hatchery

This brine shrimp hatchery from Koller simplifies the entire process of hatching your shrimp and feeding them to the critters in your tank. Mounting to the frame of your aquarium, this Koller brine shrimp hatchery integrates your brine shrimp directly into your aquarium environment. Instead of growing them completely outside the tank, harvesting the tiny shrimp, then dumping them in your tank, with the Koller setup the shrimps simply have a safe place to hatch before finding their own way into your tank!
All you have to do is mount the Koller, fill it with water from your aquarium, hook up the aeration tube to your aquarium’s pump, and add eggs!
You’ll want to position a light over the aquarium. This will attract the phototactic shrimp larvae to the hatcheries Dispenser Port where they can find their way into your tank. Just like that, your fish have a steady supply of freshly hatched shrimp larvae as they wriggle their way out of the hatchery.
This is a great design that really streamlines the entire hatchery process. The only drawback is that it is really one tank, one hatchery design, so if you were hoping for a system where you can harvest your shrimp to feed multiple tanks, you might want to look elsewhere.
Pros:
- The simplified design removes the need to harvest shrimp
- Great for added peace of mind when leaving your tank alone for extended periods – you’ll know there is a food source growing away!
Cons:
- Doesn’t give you the ability to harvest shrimp for use in other tanks
- Brine shrimp water can be dirty and loaded with ammonia and nitrates. You don’t want to add that to your reef tank.
- We also all know that suction cups often fail…good luck if this slips
San Francisco Bay Brand ASF66190 Brine Shrimp Hatchery

This kit is simple, yet effective. Included with the purchase, you get a bottle stand, an aeration tube, and three packets of brine and shrimp eggs. To start hatching shrimp, you’ll need to supply a 2-liter soda bottle, an aquarium pump, and a light.
Included with the brine shrimp hatchery kit are full instructions for getting it up and hatching. You’ll need a 2-liter soda bottle to serve as the hatchery itself. The aeration tube (which will double as a harvesting tube) feeds into the bottom of the bottle stand and connects to the bottle, which sits inverted on the stand. Add your water and brine shrimp eggs to the bottle, connect it to the stand, and connect the aeration tube to your aquarium pump.
After 24-36 hours, you should have a generous portion of brine shrimp. You can turn off the air pump. Now shine a light into the bottom of the 2-liter bottle until all of the shrimp have collected next to it. You can now drain them off through the aeration tube and feed them to your fish.
Overall, this is a very simple design with some assembly required. However, it is remarkably efficient and effective in its simplicity.
Pros:
- Affordable, simple product
- Gets the job done effectively
Cons:
- Some assembly is required. It requires a 2-liter soda bottle, light, and an aquarium pump.
Brine Shrimp Direct Hatchery Dish

The Brine Shrimp Hatchery Dish, by Hobby, is a desceptively simple design that turns out to be quite elegent, indeed! Here is my caveman understanding of how it works: it’s a bowl, that holds water. It is designed by people who are way smarter than me.
There’s this mazey- looking white plastic piece you put in. It breaks the water up into 3 sections. You put your eggs/cysts in the outer edge. They’re just eggs. The don’t think, they can’t swim, they just float in the outter edge–and maybe, if you bounce the water around too much, they get into the second ring…but that’s okay. You put this tiny sieve/trap in the center, where it sits, until you need it. With the lid on, it’s all dark, except for the hole that sits above the sieve/trap. Artemia are smarter than the empty cysts they hatched from and are attracted to the light, so they swim past the maze thing into the ring of light, where they wait for you to catch them.
It doesn’t incorporate any aeration or artificial light sources.
You simply:
- Open up the dish (actually that might be the hardest part, because the molded plastic doesn’t really have a good handle to hold on to…you sort of jab your fingernail into the crevice between the two pieces…but I digress)
- Put the collecting cup in the center of the dish
- Add your saltwater up to the well-marked FILL LINE
- Put the little white maze thingy in place–it’s just s small piece of white plastic–again, deceptively simple. It doesn’t look like much, but it clearly is the piece that traps the shells
- Add a few sccopes of your brine shrimp and eggs around the outer rim–I own this hatchery and use 3-4 scoops
- Replace the cover and set the dish in a location that willg et sunlight.
There are no other moving parts, and the best thing is that every time I walk past the dish (it’s by the window of my home office, where I work all the time now…thank you, COVID), there are a bunch of unsuspecting, wriggling brine shrimp nauplii there every time I walk past.
I just grab the handle of the trap/sieve, pull up…and by pull up…I literally just mean use a finger and a thumb and move in an upward direction… and voila, instant live food for my fish.
Zero mess. Zero cysts. I don’t add any dirty water to my tank, I just lift it up, then run it the other direction through my tank water, freeing the tiny larvae. Even though the larvae are tiny, the fish zip around and gobble them up!
Pros:
- Super simple
- If you’re near the trap, it’s almost addictive…how many did I catch this time?
- Requires no external pump or light
- The sieve let’s me capture the live brine shrimp without adding any of the filthy hatching water to the tank!
Cons:
- I suspect hatch rates might be higher if there was oxygenation, but can’t verify that
Which is the best brine shrimp hatchery?
As you can see, you don’t need a lot of sophisticated equipment to start hatching your own brine shrimp. Any of the kits on this page will get the job done. If you haven’t already decided which model you prefer, I’ll share my own recommendation below.
After exploring a few of the best brine shrimp hatchery kit options available online, here is my recommendation on which one is best.
My recommendation
I recommend the simple, effective and addicive brine shrimp hatchery dish!

It’s hard to express in words how much of a fanboy I am over this seemingly simplistic dish. Yes, the blog does earn some small commission if you buy via the links here (and thank you, by the way, if you choose to use them), but I am 100% authentic in saying this little dish is so cool. If I didn’t have this blog, I’d meet fewer people, but I’d still be raving about this silly little thing.
My fish and my corals are spoiled now, with live “zooplankton”, every day. The only thing that gets in my way is the laziness of not cleaning it out after a few days…and cleanup is probably the easiest task in this hobby.
What to read next
If none of these are right for you and you’d rather build one for yourself check out this DIY guide.
I started growing my own baby brine shrimp once my clownfish started laying eggs–if you want to learn more about breeding saltwater fish, check out these guides:
Last, but not least, you might want to check out other popular product review guides:
Check out this guide to picking the best salt mix
Enjoy this new aspect of the hobby. You’ll be a fish or coral farmer soon enough 🙂 !

Leave a Reply