A few weeks back, I was listening to the Reef Therapy podcast—shout out to Jake and Mark, where they talked about their aquarium hacks—and mentioned live baby brine shrimp as a hack for replacing live copepod or zooplankton supplement feeding. I’ve had a can of brine shrimp cysts in my basement for like…7 years that I just haven’t used…and I thought…I should give that a try.
Then, serendipitously, Linda Johnson, a SaltwaterAquariumBlog reader, posted a comment about how easy the Hobby brand brine shrimp hatchery dish was to use…and I decided…what the heck, let’s give it a shot. Thanks, Linda!!
This seemingly simple gadget is not new, not complicated, but it is cleverly designed and is awesome. It makes it so easy to hatch and harvest brine shrimp each day (or several times each day). Now I feed my tanks a blast of live brine shrimp (substantially similar to zooplankton) a few times each day.
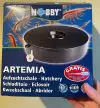
The Hobby brand brine shrimp hatching dish is not a new product. I don’t know how I lived so long without it. I’m having so much fun with it, that I had to tell you about it.
Here’s how the Hobby brand brine shrimp hatchery dish works.
So easy to use
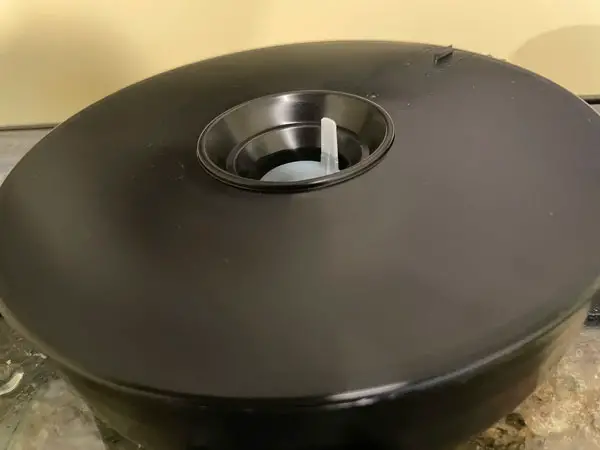
First, it’s a simple, shallow black dish, about 8 inches wide and 2 inches deep.
Step 1: You fill the container up to the “Fill” line (to keep it simple, I just used aquarium water)
Step 2: Place the plastic maze-like insert that you put in the middle that creates some compartments/chambers in the tank and the strainer in the center
Step 3: Sprinkle your brine shrimp eggs around the outside ring

Step 5: Put the black lid on top.
Step 6: Wait 24-48 hours, then start harvesting your shrimp.
Why it works so well
The cysts float when first introduced and sink once the nauplii have hatched. Since the brine shrimp are drawn to light after they hatch, they swim past the plastic maze insert to the center of the dish, right above where the strainer sieve is, so you simply grab the handle of the sieve, pull up, and you’ve caught yourself a bunch of baby brine shrimp.
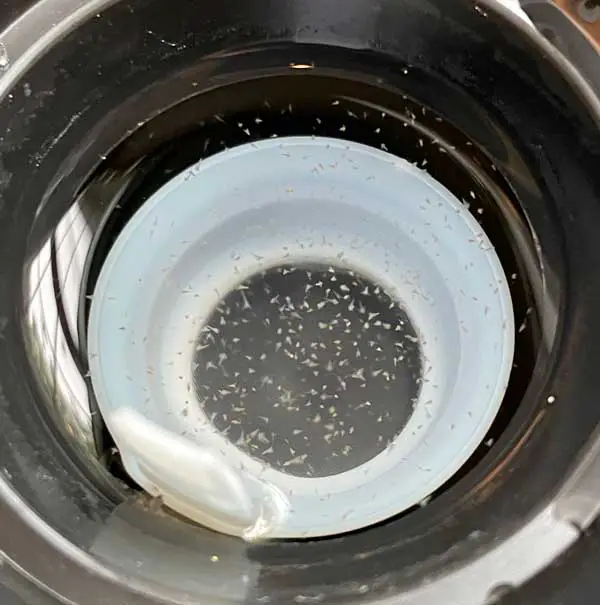
You can see the newly hatched shrimp swimming just above the strainer that catches them super-easily. Put the stainer back in, wait another 2 minutes and do it again. It’s actually a lot of fun.
How I feed
I’ve been feeding my tank in two ways. I will collect several batches and hold them in a small volume of water in a specimen container.
Since the sieve traps them when I pull it up and out of the water, to collect, concentrate and release them, I just swish the sieve in the opposite direction. The reason I use the specimen container is that I can just get an inch or two of water in there, and the rectangular shape gives me a few inches of runway to do the ‘swish’ and release the nauplii.

Then use a Sea Squirt or Julian’s Thing to target feed my corals (with the pumps off)
Other times, I just take the strainer right over to the tank and release them into the water column and watch my fish swim around and gulp them right out of the water column. They get really excited and can’t resist.
I’m fortunate that I can work from home most days. I keep the Hobby brine shrimp hatching dish right by the window next to one of my tanks, and it’s so much fun to see the little twitching cluster of fish food and ‘catch it’. This is the best little gadget I never knew I couldn’t live without. It is actually fun and perhaps a little addicting to keep checking back and catching these fun little wiggly guys.
Why this invention is so cool.
If you’ve ever hatched brine shrimp before, you’ll know there are a few hassles.
- You generally end up harvesting a bunch of ugly, floating cysts each time you harvest brine shrimp. The cysts pollute your tank water and just look ugly. They tend to float at the top of the waterline, being very noticeable. They get stuck to the glass, lid, etc.
- The hatchery water can get pretty foul compared to your aquarium water and growing your own brine shrimp used to involve a lot of either polluting your tank or rinsing
This kit is so simple, yet so elegantly designed. The cysts stay in the other compartment and the brine shrimp swim to the perfect spot to be captured with ease and without the need to suck up any of the hatchery water.
Now I literally have a daily supply of calorie-packed live foods that I feed my fish and corals that takes almost no effort at all.
You should totally give it a try. Check out the Hobby brand brine shrimp hatchery dish today. Right now it’s under $25 and it couldn’t be easier.
Get the gear
Want to add any of the gear mentioned here to your collection?
Please consider supporting this site by ordering these items on Amazon, using the affiliate links below.

Want to learn more about brine shrimp? Check out this comprehensive guide.
Want to know what other brine shrimp hatcheries are out there? Check out this review article.
Leave a Reply