
Introduction
The true test of friendship is to ask your friends for help moving an aquarium…and see how many of them stick around to hear when you’re planning your move.
Over the years, I have had to move my aquarium many times.
- From my parents’ house into my first apartment
- From apartment to apartment (multiple times)
- From my apartment to my first house
- From that house to my next house…and so on
I’ve moved my aquarium so many times that I could probably do it in my sleep.
The secret to successfully moving an aquarium is…
preparation and planning…go figure.
In order to be successful in moving an aquarium, you need to anticipate what is going to happen to your fish, and invertebrate friends and plan to keep them happy and healthy along their journey.
Here are the steps I have used over the years to successfully move my aquarium again and again.
How long is it going to take?
The preparation for moving your saltwater aquarium is going to take you several hours.
These will likely be stressful hours.
Hours that your family and friends (if they are helping you) are going to want your time and attention focused on moving other items. Which is another reason why planning your aquarium move is critical.
One of the hardest parts about moving an aquarium is that you can’t do very much of it ahead of time.
You can pack your clothes ahead of time, and even the dishes (if you don’t mind eating from paper plates), but the only thing you can really pack ahead of time for your aquarium is the stuff you don’t use.
Everything involved in keeping your livestock alive, you need to keep running, right up until the end.
Planning an aquarium move
Moving an aquarium can be stressful, so it helps to have a good, clear plan.
You will want to plan out:
- How you will break down your existing system
- How you will pack up and move the three categories of stuff (described below)
- How you will clean up
- Where you will set up your tank in your new home
- How to ensure you have enough high-quality water to set up the tank on the other side
- What other people, helping you, should be doing while you have your arms up to your armpits in aquarium water
When moving your aquarium, you need to make plans for moving three categories of stuff.
Each category has its own needs as far as logistics and handling. Those categories are:
- Livestock
- Equipment (and non-living decorations)
- Tank, stand and sump
My rationale is that the items within each group all need similar handling.
Livestock
When moving an aquarium, all the living things from inside your tank have a few of the same basic needs.
They need to be transported in a waterproof, temperature-controlled (if possible), ‘smooth-riding’ (if possible) way.
Equipment
The equipment needs to be cleaned, dried and protected from banging around either in a box or into another piece of equipment.
Tank, stand and sump
The tank, stand and sump need to be clean, empty, and need to be packed LIFO (Last In, First Out)—which means you want it to be the last thing on the truck and the first thing off, if you intend to set the aquarium right back up when you arrive.
Stuff you will need to move an aquarium
Here is a list of some of the stuff you will have on-hand when moving an aquarium (if you want the move to go smoothly):
Buckets with lids
You are going to need buckets with lids. Lots of them. In fact, you probably can’t have too many buckets. If you still have a while before your move, stop buying salt mix in boxes (if you are) and get the size that comes in a bucket.
Stop buying this:

and buy this instead:

You’ll need those buckets. Alternatively, you can buy buckets at Lowes or Home Depot.
Coolers
Coolers—you are going to need a few of these.

It is important to plan ahead, with regard to cooler space, because don’t forget, you’re probably going to be moving stuff out of your refrigerator and freezer on the same day you are moving your aquarium.
If your hard-sided coolers are going to be occupied with beer…more beer…and whatever else is in your fridge…
consider using soft-sided coolers, like this:

or even styrofoam coolers like this:

However much cooler space you think you need–plan on having more available, just in case.
Here is a quick tip: your Local Fish Store (LFS) is probably packed to the gills with extra Styrofoam coolers from livestock and live rock shipments.
So if you have the luxury of planning your move a few months in advance, or if you have a hoarding problem, like I do, consider asking them if they have any extra coolers the next time you go shopping there. It might save you some money, in the long run.
Plastic bags and containers
Ever notice how they bag up your livestock at your local fish store? I do. I watch them every time in amazement.
I even bought bags like that one time, thinking I could ‘recreate the magic’.
Well, I can’t. Perhaps you can, but a much easier way to bag up your livestock is to use several large quart or gallon-sized Ziploc style freezer bags.

I prefer the Freezer bag style, because the plastic is thicker, and therefore less likely to rupture during transit.
In addition to the plastic bags, you’ll probably also want to stock up on some of those reusable plastic containers.
The kind you would stick leftovers in, after a big meal, or to bring a reheatable lunch to work.

I prefer to use Ziploc bags for packing fish and mobile invertebrates.
The rigid containers work better for corals, because plastic bags with live rock, in my experience, tend to get punctured and leak.
Towels and paper towels
If you don’t realize this already, let me break the news to you. You’re going to get water all over the place.
Not tap water.
Smelly, dirty, fish tank water.
You and I both know we love our fish, corals and the water they swim in, but you’re going to make a mess. You’re also going to need to dry out your stuff.
So stock up on plenty of towels and paper towels.
You might not want to use your Han Solo Frozen in Carbonite replica beach towel for this job:
when Hunting for Bounty (see what I did just there…?) will do just fine.


Ok, moving on.
Friends or an aquarium moving service
Hopefully, you started trying to make friends before you decided to move an aquarium.
If not, you may be in trouble.
It would be best if you had a few good, strong friends. If they’re not available, any friends will do.
If your friends are unavailable, enemies will also work, as long as they work.
Absent that, or if you have some excess cash, a moving service would be good.
When moving an aquarium, you’re going to have a lot of stuff.
Moving aquarium livestock
Now that you’ve started planning out your move, let’s dive a bit deeper about how you are going to move your aquarium livestock.
When I refer to livestock, I mean:
- Corals
- Fish
- Other invertebrates
- Bacteria
Moving bacteria…really?
Were you planning to make special accommodations to move your bacteria?
You should.
While the lowly bacteria in your tank may not possess the show-stopping beauty of your prized fishes and corals, keeping them happy and healthy along your move is critical to the success of your aquarium move.
If you do just one thing right while moving an aquarium…make sure it is this
When moving an aquarium, make sure you’ve planned ahead to keep your biological filter alive.
You wouldn’t add a tank full of fish and coral to a brand new, never-been-cycled aquarium tank.
That would be disastrous (and expensive).
Your prized fish and coral may be rare or gorgeous and are certainly worthy of paying close attention to caring for them delicately, but every one of them is dependent on those lowly bacteria in your biological filter to keep them safe and sound once you move your tank.
So treat those bacteria like the precious organisms they are.
That is the most important thing you can do when moving an aquarium.
Here is why:
The bacteria in your aquarium serve as the backbone to your biological filter, which organically and naturally processes the toxic waste created by all the living things in your aquarium into less harmful nitrates.
From the day you cycled your tank until the day you break it down for your move, those beneficial bacteria have been living, breathing, reproducing and dying in your tank—performing the biological equivalent of a wastewater treatment plant.
Those bacteria (and other “stuff”) are on virtually every surface in your tank. On the sand, the live rock, the inside of the glass, the sump, the skimmer—everywhere.
Many of those surfaces you’re going to dry out, clean up and pack away.
Some of that life will also be free-swimming in your conditioned aquarium water—but the shipping water that you pack your fish and coral in will quickly foul due to the drop in temperature and other sub-optimal conditions it will face.
Freshly mixed saltwater, in stark contrast, is void of this microbial life. So when you dry your tank out, clean up your equipment and pack everything up, you lose massive amounts of that biodiversity you built up over time.
It is critical, therefore, when moving an aquarium, to take care of the microbes that take care of your tank—and have a plan for maintaining the biological filter.
You want to:
- Preserve a large culture of bacteria and treat it like a prized, $200 fish
- Clean exposed (dried) surfaces in your tank well to remove the biofilm (because it will later decay once you set up your tank again)
- Plan to move a sufficient population of bacteria to help kick-start your tank on the other side.
Preparing your bacteria
The first thing to do when moving an aquarium is to take steps to minimize how many dead bacteria you move with your aquarium.
Here are a few steps you can take:
- Keep your live rock damp by wrapping it in damp towels and packing it in an insulated (Styrofoam) cooler. You can afford to pay less attention to the live rock than your prize fish or coral, but nonetheless, your live rock should be treated like livestock.
- Get rid of most of your aquarium sand. In my experience, aquarium sand doesn’t move well. By the time you get it to the newly set up tank, it will smell of death and sulfur. You don’t want to put that back in your tank. You can take move a few sandwich bag samples of it, but don’t plan on moving large quantities.
- Clean the inside of your tank, sump and all of the equipment before you set the aquarium back up. Do what you can to try and remove the dead layer of cells encrusting everything that used to be underwater and dried out (and/or heated up, cooled down, etc.). You don’t want to start off with a giant ammonia spike.
Transport a few bacteria starter cultures…and a backup
When you arrive at your new home, you don’t want your aquarium to have to start over and fully cycle.
That would be disastrous.
If you take steps to carefully move your live rock, I’m certain that many bacteria will survive and colonize your new tank–but I like to be prepared.
About a month before you move (hopefully you are reading this ahead of time), place a few sponge filters in your sump or tuck them out of sight behind the aquascape, if you don’t have a sump.
You don’t have to plug them in or set them up or anything, you just want the soft sponges submerged in your aquarium or sump.

During the month before your move, the surface of the sponges will become colonized with beneficial bacteria that you can use to jump-start your biological filter when you set your tank back up.
When it is time to pack up your tank, pack the sponges up, just like you would pack a fish or a coral in a plastic bag or container and transport it in the cooler with your fishes and corals.
If you bagged up a few small bags of your live sand, covered with aquarium water, pack those up in your cooler too.
As an added precaution, consider buying and adding a biological filter supplement, too. A filter crash and the resulting ammonia spike are one of the greatest threats you have overall to re-establishing your reef tank in the new location.

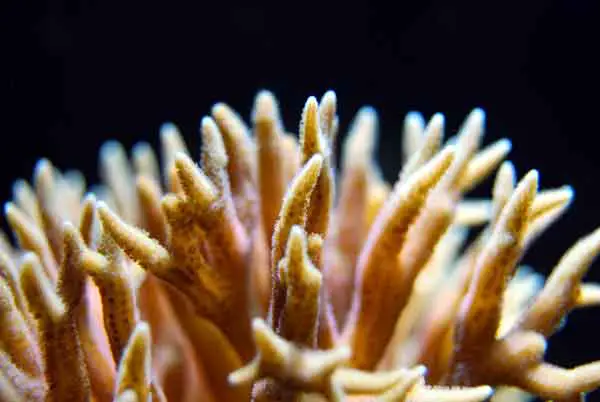
Moving Corals
The size, shape, and type of corals you have will influence the best way to pack them.
Soft corals
Soft corals are easily packed inside zipper-lock backs.
Resist the urge to fill your bags all the way to the top with water—you want to leave some room at the top (headspace) for air.
After placing your precious cargo in enough water to cover them, zip up the bags, double-bag, just to be safe and then gently place the bags in your cooler.

SPS and LPS corals
Stony corals, either SPS or LPS corals, are best packed in the resealable plastic containers, as long as they will fit in them.
Why?
The S (second S is SPS…) stands for stony.
In my experience, transporting stony corals (not packed by my local fish store) even short distances tends to lead to leaking backs.
Hard plastic containers, may cause branches to break, but they won’t leak.
For really big corals, or corals glued to large pieces of rock that can’t be separated, pack those in a large plastic bucket with a lid (filled with water).
Buckets are generally not insulated, so reserve this measure only for extreme situations.
The rest of your corals belong in a cooler—protected from temperature swings and impact.
Moving vans are exposed to the elements and can be extremely hot or extremely cold—so I recommend you leave space in your car if possible for the livestock.
Put your significant others in the moving van, if you have to, but protect those corals.
Just kidding…or am I?
Live Rock
Always wear thick gloves when picking up a live rock. There are lots of ways to scratch, sting, scratch or puncture your skin when moving around the live rock.
I prefer these gloves here:

They are 26 inches long (and therefore go most of the way up my arms) and are nice and thick.
The key to moving live rock safely is to keep the rock relatively temperature controlled (as much as is possible/reasonable) and damp.
I have packed live rock in Styrofoam coolers wrapped in wet paper towels, and I have also packed live rock in buckets filled partially with tank water (on a shorter trip with plenty of space in nice weather).
Wet newspaper is dirty, smelly and gross—and I don’t really recommend it if you have the luxury of transporting your rock in buckets partially filled with water.

If, for whatever reason, you can’t move your live rock in suitable living conditions to keep the inhabiting bacteria and invertebrates alive, make sure you set the rock aside to cycle before adding back to your aquarium once the move has been completed.
Pack up your live rock after you pack your corals, but before you pack up your fish.
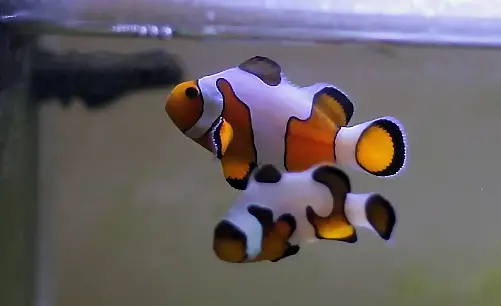
Fish
The biggest hassle in moving fish…is catching them.
Your clownfish and other greedy eaters are likely to be fairly easy to catch–my clownfish practically swim out of the tank when it is feeding time.
To make things easier to catch your fish, try to get everything else out of the tank first–including most of the aquarium water.
As you remove the water, be sure to set aside some good, clean water for packing your fish up later on. Because once you get to the bottom–and after removing your live rock, the remaining water is going to be full of sediment.
By now, your fish will be seriously spooked…and will be looking to hide anywhere they possibly can…
but if you move everything else out of the way, and lower the water level, they don’t really have anywhere to go.
It’s like scooping fish out of a barrel…
Make sure to take a roll call to make sure you have all of your fish. Sometimes fish jam themselves in the live rock. It’s better to find that out now than after you pack everything up to go.
Catching all of your fish can be a daunting, humbling experience.
You will develop your own ‘technique’ when trying to capture your fish—and if desperate, you’ll likely employ any means necessary (well, almost any means).
How to corral fish
My preferred method is to use a big scary net to ‘corral’ or ‘herd’ the fish into a hard (clear seems to work better for me) plastic container (like a specimen container).
The fish’s natural instinct is to flee the approaching net, and seek shelter—but in the empty tank—the container is the only real structure. Given the choice between the two, some fish will willingly (or unwittingly, I’m not sure) flee into the plastic container.
Bagging them for transit
After capture, I gently pour them individually into Ziploc bags, leaving plenty of headspace (air) and place them in cooler.
If you can, take the fish with you in the car rather than pack them on a truck exposed to the heat or cold.
The insulated cooler will slow down the temperature changes, but it’s likely that the environment in the car will be more hospitable than the environment on the moving van, which will help your livestock out, in the long run.
Equipment
Some of your equipment (like glass tube heaters, if you have one of those) are very fragile—so be sure to pack it with care—like a delicate plate or bowl.

Make sure the heating tube is cool to the touch before packing and then wrap with bubble wrap and place safely in an appropriately sized box with other light stuff.
Pumps, powerheads, protein skimmers, hang-on-back filters, and other equipment should all be cleaned out and dried prior to packing.
Cleaning equipment
You can use a weak acid like vinegar to break up any hard gunk. Just be sure to rinse, rinse, rinse. I usually just pack them in a bucket (because even when I try to dry them well, there is usually water…somewhere that leaks out.
Of course, your equipment would benefit from a little tender loving care (TLC) if you have the time and patience to wrap them up to prevent bumping around in transit.
Lights
Outside of the aquarium itself, your lights are probably the hardest thing to move.
I never count on my lights to ‘make it’ through the move, although LED lights tend to move better these days than the older style lights with replaceable bulbs.

While I have only had a few light bulbs meet an ‘explosive’ end, I have had more than a few bulbs (and LEDs) just decide not to work after the move.
Jostling around lights tends to be fatal to them.
Wrap your light fixtures up like delicate furniture, using moving pads or blankets—whatever is around and adequate.
The Tank
If you have made a considerable investment in your tank—and can’t afford to replace it on the other end if it cracks, I encourage you to hire a professional aquarium moving service.
Seriously.
Anytime you move your aquarium, you take a serious risk that the tank will become damaged and possibly non-functional.
It is not cheap, but the professionals will actually build (usually from scratch) a wooden crate that fits around the tanks to protect it completely during transit.
That is the best way to move your aquarium, that I know of.
If you can’t afford professional movers or insist on a DIY move, here are a few things you can do to increase your odds.
Empty the tank completely
Be sure your tank is completely empty.
Aim for spotless (or as close to spotless as is practical given the timing pressure you’re likely facing during the move) and settle for ‘debris-free’.
Protect against scratches and breaks
Protect the outside of the glass however you can by wrapping it up. As I mentioned before, the best protection is from a professional with a wooden crate.
When I have moved smaller tanks by myself (ones that I was willing to risk breaking), I preferred to wrap the tanks up with soft towels.
You can use packing tape to bind the towels tightly to the glass—be sure to cover the glass completely and use care not to get the sticky tape on the glass itself.
I then cover the outside towel layer with empty boxes cut to size and take the box container around the outside. This only provides protection from scratching and a glancing blow. Anything more serious would have permanently wounded my tanks.
Keep in mind that any sand, salt or other grit will grind away on your glass, scratching it up. Any impact can shatter the glass, and even odd stresses/pressures can loosen up a silicone seam.
Setting things back up at your new location
Now that you have taken care to pack and care your fish, coral, and equipment with care. You moved them across town or across the country. The next stage involves setting everything back up in your new home.
Test for Leaks
The first thing to do when you arrive at your new home (ok first fishy thing you want to do) is leak test your aquarium.
Set the tank up, temporarily, in a place that won’t get damaged by a flood of water if the tank leaks (like a driveway, backyard or potentially even the garage).
Fill the tank with freshwater, dry off the outside and just watch and wait. After you are comfortable that the tank does not leak, you can set the aquarium up in the new, permanent location.

Tip # 1: Be sure that your permanent location can handle the weight. Remember that a 75-gallon aquarium could weigh 800+ lbs when filled with sand, rocks, equipment, stand, etc.
Rebuild from the bottom up
Start with the substrate
After moving an aquarium to its final destination, you will need to set it all back up again.
When rebuilding your tank, you want to rebuild from the bottom up by starting with the substrate.
Ideally, you purchased new sand for the bottom of your tank.
After washing it thoroughly, gently place it in the bottom of the tank.
Here is a quick tip:
If you fill the tank with an inch or two of saltwater, the substrate will sink more gently to the bottom than if you just drop it in dry.
Layer in the live rock
After the sand is in place, next you will put your live rock back into the tank.

Take the time to set the rock up the way you want it. Once your tank is up and running, it will never be this easy to move the rocks around.
Here is a quick tip:
Do a “sniff test” before you put the rock back in your tank. You’re looking for any pungent or noxious odors. Don’t put anything back in your tank that doesn’t smell like the ocean.
Fill it up with saltwater
In the past, when I was moving an aquarium over relatively shorter distances (from one apartment to another across town, or just a couple of hours away), I have actually moved buckets of aquarium water—no joke.
The key to moving buckets of water is to keep them relatively temperature controlled.
For me, that meant moving them in the car/van and only over short distances.
Make sure your buckets have lids
Don’t over-fill the buckets. Even with lids, the buckets will leak, if the water sloshes around too much.
Mature aquarium water is teeming with life…and freshly made saltwater is relatively sterile.
I can’t support this with any specific research, but I suspect it is better for you to move a reasonable quantity of mature water if you are able to.
However, if your move is longer than just across town on the same day, or if conditions are severe (hot, cold, etc.), then don’t bother, you’ll just be moving heavy, wet buckets of slop.
Here’s a tip when moving water:
Make sure whatever you pack near your buckets of saltwater can handle getting wet. During the move, the water may slosh around in the bucket—and even with lids, I have had water spill.
Plug in the life support systems
Now that you have your substrate, live rock, and water in the tank, it is time to connect your life support systems, if you can.
At a minimum, you want to connect your heater (assuming it’s submersible and there is enough water in which to submerge it) and a means for creating water movement—perhaps a powerhead, airstone or even a simple sponge filter.
The goal is to have enough life-sustaining capacity to sustain your tank’s inhabitants for a few hours up to a few days, while you reestablish your tank.
I like to leave the equipment running in the mostly empty tank until I can confirm the heater is operating normally and holding the right temperature.
Once I’m comfortable that the heater thermostat is working normally—and the water temperature is stable, I move on to the fish, coral, and other invertebrates.
Bacteria, Fish, Coral, and Other Invertebrates
Finally, it is the time you’ve been waiting for this whole time moving an aquarium—time to get your livestock out of their bags and into the aquarium.
I’m a proponent of the ‘drip method’ of acclimation—and in a big move like this, it helps to have a lot of buckets, a lot of air tubing and some valves.
You can get these on Amazon.com.

When acclimating your livestock, the goal is to avoid exposing them to sudden changes in water parameters (temperature, pH, etc.), so the drip method allows for a gradual, consistent acclimation.
When possible, I like to acclimate each specimen in a container separately. I do bend that rule with schooling fish (like a handful of chromis) or a pair of clownfish if I’m confident that the water hasn’t deteriorated noticeably (short moves, pristine water, etc.).
Once your fishes, corals, inverts and sponge filters have been sufficiently acclimated, you can gently add them to the aquarium.
Final Steps
If you have been following along the steps I laid out for moving an aquarium, you should now have a mostly filled, and minimally operational tank.
The water level may be lower than usual, but you should have enough water to operate the life support systems (sponge filters, heaters, powerheads).
Once all the livestock is in the clean, temperature-controlled, aerated aquarium, you can make up as much new saltwater as you need to fill the tank, gradually, being careful not to introduce too much freshly made water too quickly.
Here is another tip:
Think of the final step as ‘water changes in reverse’. I generally add 10-20% of the missing water volume back at a time—and take steps to ensure even those additions are gradual.
Over the years, I have found that the best piece of equipment to help me here is the Aqualifter pump.
This tiny pump will lift 3.5 gallons of water per hour—a nice, slow and steady stream that your coral, fish, and invertebrates won’t even notice.

Monitoring and Testing
It goes without saying (or did I just say it?) that you should test your aquarium water routinely.
But testing is critically important when you set your aquarium back up after a move.
You want to watch out for spikes in ammonia, nitrite or nitrate.
Lots of things can go wrong during the move—and the only way you will know is to watch your tank’s inhabitants and test the water parameter.

Any questions or tips you can share?
I hope you enjoyed reading this definitive guide to moving an aquarium.
Hopefully, you found an idea or two that will help you design the best plan that will work for your own situation.
Do you have any questions about moving an aquarium that wasn’t answered here?
Have you moved your aquarium in the past–are there any tips or suggestions you can add to help out the community?
Please leave a comment below to share your thoughts or questions.

Leave a Reply