When my pair of ocellaris clownfish spawned on the aquarium glass for the first time, I tried to learn everything I could about how to breed clownfish and raise the eggs into juvenile fish. I was amazed to find out how important phytoplankton are to the whole process. Phyto are a basic producer in the ocean and they also serve as basic food for the foods that we feed our baby fish. They are also an important food for some of the invertebrates in our reef tank.
Buying phytoplankton at the store over and over again can be expensive. So I researched online and in books and started growing my own phytoplankton at home. Here’s what I learned and how I do it.
To grow phytoplankton, you need to provide a starter culture with light, nutrients, carbon dioxide, oxygen, and a clean place to live. About every 7 days, you harvest about half to two-thirds of the culture to feed your rotifers, brine shrimp or corals, and you repeat the process over and over again.
Phytoplankton Culture: A How-to Guide to Growing Phytoplankton at Home
In the ocean, fish and invertebrates have access to nature’s bounty and dine at the best buffet line ever created.
Aquarium food tends to be much less interesting.
One thing you can do to liven up the food chain in your aquarium is to culture phytoplankton at home.
- Where to buy a phytoplankton culture online
- A helpful “How to” video with step by step instructions
- Culture equipment checklist
- Where to get your equipment
- How to set up the equipment
- Making the media
- Starting the culture
- Growing out the phytoplankton
- Harvesting
- Testing and optimization
- Storage
- Dosing
- Definitions
Where to buy a phytoplankton culture online?
This article was written to provide step-by-step instructions on how to take a live nannochloropsis, tetraselmis, or other live culture of phyto species and grow it out for home aquarium (or other) use. The very first step in this process is to buy a living, thriving culture of the single-celled green or brown plankton, one of the first links in the ocean food chain.
There are a lot of great options today–you can start with a starter kit, that has a starter culture, glass jar with lid, rigid tube cut to the right length, fertilizer, salt mix, and culture media:

See the price on Amazon for this fantastic kit for beginners
Or just start with a healthy culture and build your own setup (I will describe below)

That link and a few others on this page are affiliate links. If you buy something on Amazon after clicking through from this site, they will provide me with a small commission at no additional direct cost to you. Thank you, in advance, if you choose to do so–that’s one of the ways I’m able to pay for the expenses from this site so that I can keep writing articles like this for free.
Phytoplankton Culture Equipment List
You will need some dedicated equipment to start off. The good news is that you can pick most of this gear up easily and inexpensively. Here is what you will need:
- 36-48 inch LED light
- On/Off Timer for the lights
- Air pump
- ~10 ft. Flexible airline tubing
- ~ 3 ft. Rigid airline tubing-you can order this online but you’ll find it much cheaper in a big box pet store
- Multi-outlet airline splitter/valve
- 5-6 clear plastic water, juice, or soda bottles
- Aquarium salt mix
- Fertilizer f/2 Formula
- Phytoplankton starter culture, like Nannochloropsis occulata
Feel free to customize this list based on what you have available to you. For example, you could use a 48-inch fluorescent tube shop light instead of an LED light (that’s what I used years ago…before LED lights were this inexpensive) or one of the new upgraded models like this one:
The key here is that you want to create a wide band of light, vs. a really narrow light. I know that I’m oversimplifying things here with this analogy, but think of the light as feeding the hungry little phytoplankton cells. Those cells are multiplying in your culture and crowding up in the container trying to get to the light–so the more you can spread out your light (without losing quality/intensity), the more phyto you can ‘feed’ at a time.

A light like this will work too:

if you want to have a smaller footprint and just a couple of containers growing at a time.
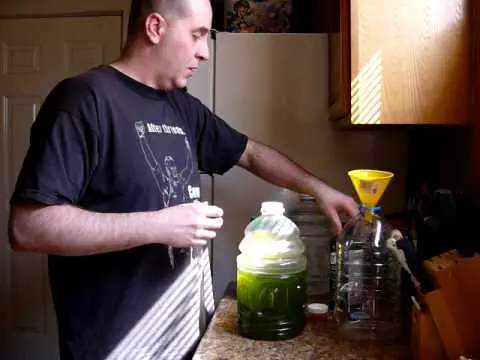
A lot of people also use empty soda bottles instead of gallon jugs. It all depends on how many bottles you want to start and how much phyto you want to grow. I was using large bottles to create large volumes for breeding saltwater fish. If you are growing this just to feed your reef, you probably want to use the ~0.5L water bottle size.
At one point in time, I had 7 x 2L bottles running with my phytoplankton culture. Over time, I found that working with a few, larger containers were the right tradeoff of time/maintenance required.
One final point about the containers you use: not all containers are created equally. The name of the game here is efficient light penetration into the inside of the container, where the phytoplankton will live. Just about any container that lets light in will work, but you’ll have better results with clear glass or plastic vs. frosted or otherwise opaque. It will still work even with opaque (I used to use gallon water jugs that were frosted), but your most efficient operation would involve clear plastic.
The good news is that you won’t need equipment like protein skimmers, aquarium chillers, or heaters.
Where to get your equipment
You could get most of this equipment at your local pet store, hardware store, or online at amazon.com.
This is what the algae and rotifer station looks like at the Adventure Aquarium, in Camden.

Those 5-gallon jugs make a lot! But you can see that even the professionals use the same basic setup. It looks like they are using the 48-inch shop lights.
How to set up your phytoplankton culture equipment
- Mount the LED light horizontally on a wall just slightly above table height, not like in the image above.
- Slide the table up against the wall, just under the light
- Spread your culture bottles out along the length of the LED light to give each bottle maximum exposure to the light output
- Cut 3 pieces of rigid tubing to be at least 12 inches high. You want it to be long enough to reach the bottom of your culture bottle and still extend over the top of the container
- Measure how far away the splitter will be from each of the culture bottles and cut 3 pieces of flexible air tubing long enough to reach from the top of the rigid tube over to the airline splitter
- Measure how far away the splitter will be from the air pump and cut 1 piece of flexible airline tubing long enough to reach from the air pump to the input side of the splitter
- Attach flexible tubing from the air pump to the splitter
- Take 3 pieces of flexible airline tubing and attach them to 3 open ports on the airline splitter
- Then, attach the other end of the airline tubing to each of the 3 lengths of rigid tubing
- Insert rigid tubing into a culture bottle
- Turn on the air pump
- Fill bottles with a small amount of freshwater to test and make sure all 3 airlines create a modest flow of bubbles. Adjust the flow rate on the splitter as necessary to create uniform moderate flow
This is what my setup looked like
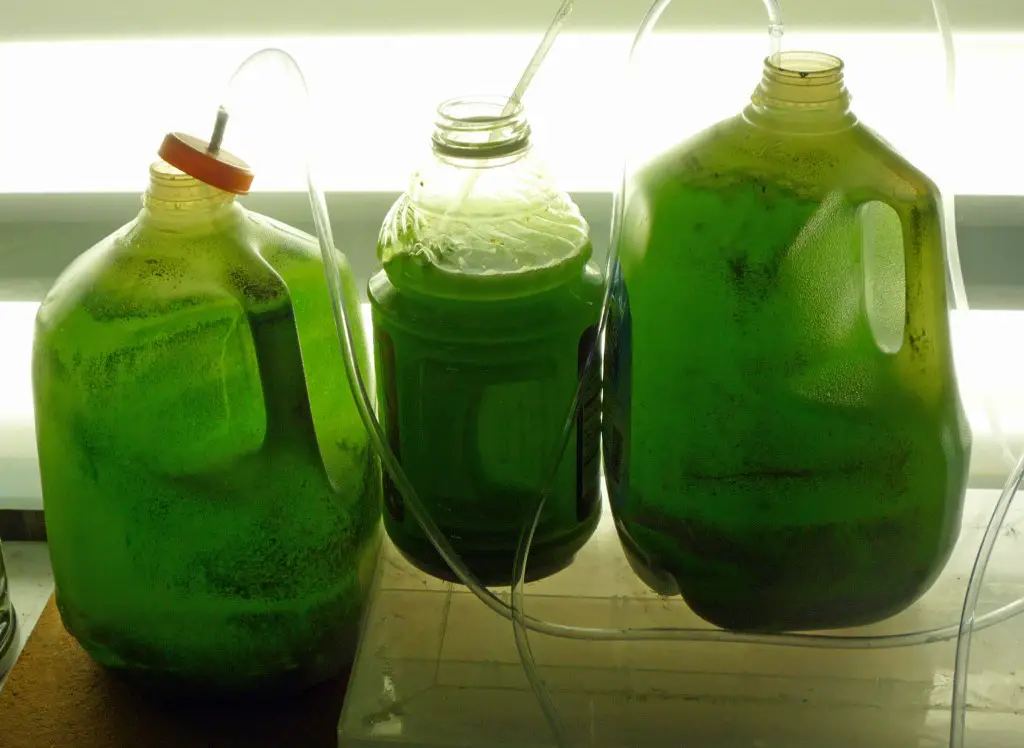
The image above shows what my phytoplankton culture setup looks like. I have a 48-inch fluorescent shop light mounted horizontally, behind the table and three culture containers–two 1 gallon jugs and 1 32-ounce jug. When I first started, I had more 2-L soda bottles, but I found that the 1-gallon size, for me, was the right blend of volume and maintenance that I was looking for.
The opaque nature of a water bottle is not ideal–it reduces the amount of light reaching the culture. However, I did not experience any problems with it.
Note, also, that I do not use tight-fitting lids. Many people recommend that. I suppose it probably is the best practice, but I did not have any issues with leaving them open.
Making the Phytoplankton Culture Media Before Starter Culture Arrives
In order to grow your phytoplankton, you want to create what we will call the culture media. The culture media is the saltwater solution that the plankton will grow in. What you are aiming for here is to create the ideal conditions for rapid growth.
As mentioned before, I grow Nannochloropsis occulata, which is a phytoplankton that prefers relatively dilute saltwater and fertilizer.
Here is how you make the phytoplankton culture media:
- Slowly add aquarium salt mix to freshwater to create a gallon of the saltwater solution with a specific gravity of 1.014. Remember, this is less salty than full-strength aquarium water.
- Stir the water, then add the F/2 fertilizer according to the label–if using Micro Algae Grow, from Florida Aqua Farms, then add 40 drops per gallon.
- Let the water ‘age’ overnight before using this water officially in your culture. Please take this step at least a day before your starter culture arrives. That will allow time for you to safely ‘age’ your water,
Starting the Culture—What to Do Once Your Starter Culture Arrives
Once your starter culture arrives and you are ready to start growing phytoplankton at home, you can start by:
- Carefully pour your starter culture into a clean water jug
- Add enough media to the culture to double the volume in the jug. (eg. if you have 500 mL culture, add 500 mL of media)

A few notes/commentary here: if you are starting out with a small culture, you may want to start with a small/narrow container so that you can give the culture proper illumination from the side. The more volume you have, the more phytoplankton you can and will eventually grow, so you are trying to increase the culture to fill the containers, but you want to do so gradually so that you don’t shock and kill the culture.
- Insert a rigid airline into the culture jug and start a moderate flow of bubbles.
Watch the culture over the next few days. Doubling the volume of water in the culture should turn the color from a relatively darker green into a relatively lighter green.
Once the culture returns to the original shade of green, double the volume again one more time and repeat this process until you completely fill your culture jug. (to continue the example we started before, you would add 1000 mL of media to the 1000mL culture and then fill it to almost the top a few days later when the culture is dark green again—at that point, you should have a 1-gallon culture of phytoplankton)
You will also need to make another batch of culture media. This time, you will need 2 more gallons of media.
Grow-out and Harvest
Once you have filled your first container, the culture is up and running. Now your goal is to split up the culture running in a few more bottles. After a few days, when your 1-gallon culture bottle starts to turn dark green, you want to separate that culture:
- Pour 1/3 of the culture into 2 new bottles, so that there is 1/3 gallon in each of the three bottles now
- Top them off with fresh media, set them in front of the light, and get ready to harvest in a week. From then on out, harvest 2/3 of each bottle, keep the remaining 1/3 in the original bottle, and top-off with new (aged) media.
- Place rigid airlines in all 3 containers and ensure each culture bottle has moderate bubbling and good exposure to the light
You want to be careful when removing the rigid airline from the phytoplankton culture. One of the biggest risks you face is contaminating your culture and causing a culture crash. You will want to sterilize the areas before you put the tubes down and try to minimize contact with unclean surfaces.
Harvesting Phytoplankton
You harvest the phytoplankton by removing 1/2 to 2/3 of the culture from the growing container, approximately once/week.
Simply pour out 2/3 of the culture into a storage container (or package into smaller bottles) and refill the volume with new (aged) culture media.
A quick post here to think about—do you want or need a continuous source of the freshest phytoplankton or do you want to minimize the time you spend doing all the phytoplankton culture chores?
Your answer to the question will provide you with an opportunity to tweak the methods described here to best suit your own needs.
Your phytoplankton culture will yield ~2 bottles full of dense culture about every 7 days. The actual amount depends on the intensity of the light, bubbling, culture growth, etc. If you can’t use or store that much, you may want to scale back and use smaller bottles and/or stagger the harvest days.
Rather than harvest 2/3 of the volume every 7 days, stagger things on your first harvest so that one container is harvested 2/3, one by 1/2, and one by 1/3. The container that was only 1/3 harvested will ‘green-up’ first in a few days, followed by the 1/2 container, followed by the 1/3 container.
Once they green up, harvest an equal amount every time (go back to 2/3 for all containers). They will be mature/ready for harvest on different days of the week. That will optimize your process for freshness.
Testing and optimization of the process for what works best for you
After you have a few weeks of experience, experiment to figure out the optimal timing is based on how quickly your culture grows and how frequently you have time to harvest your culture.
At some point, the culture will be at its darkest color. Theoretically, that is the ultimate, mathematically correct time to harvest. If you harvest before that, your culture is lighter in color and less dense. After that point, some cells die and the culture again gets lighter in color.
You don’t have to harvest at peak density, but it is worth figuring out what works best for you and your schedule, once you have the hang of it.
Phytoplankton Culture Storage
Try to use some of your fresh phytoplankton right away. If you did grow more than you can use, storing your phytoplankton is easy.
Simply fill and cap empty water bottles and keep them in the refrigerator.

If storing the phytoplankton for longer periods of time, you’ll notice that the phytoplankton cells settle to the bottom–make sure you shake it up at least once a week, or the culture will spoil/rot.
Look for any off smells from your phytoplankton and dispose of older, saved material if you detect strong ammonia. Don’t take any chances there, it’s not worth it.
Here is an important, real-life tip: if you are using a food refrigerator, be sure to keep things separate from food items. You don’t want to cause contamination or make anyone sick. Also, be sure to label it very explicitly.
I warned my family and kept the bottles out of the way. They knew to stay away, but an extended family member was over at our house one day and I didn’t think to brief them.
Quite honestly, I didn’t expect them to dig through the bottom of the fridge to find a gross bottle of water :).
The “water bottles” in the bottom of the fridge were filled with rotifers (not phytoplankton) and they drank it. Yes, they drank it. Gross. Luckily, they didn’t get sick
Dosing Phytoplankton
Once you grow phyto easily in your home, the next step is to determine how much to add to your tank and when. Here is more information about how to dose phytoplankton in your reef tank
Watch this video for some helpful background
If you’re looking for more information, or for a hands-on approach, check out this video here:
Phytoplankton are one of the basic building blocks in the food chain on a reef. However, they can be expensive to buy regularly for your reef tank.
It can be fed to corals and clams or be used as a nutrition-packed food for other live foods like rotifers, copepods, or brine shrimp. Loading up the guts of these other live foods with nutrient-rich phytoplankton is a technique used by aquaculture houses called gut-loading (literally loading their guy with phytoplankton).
If you gut-load your foods with plankton, the fish or corals in your tank not only get the nutritional benefits of the brine shrimp themselves, but they also get nutrition from the phyto.
If you are interested in breeding saltwater fish, you will need to master the art of phytoplankton culture–so that you can feed the tiny fry that is born.
Here is how I established a phytoplankton culture when I was breeding saltwater fish:
Definitions
Phytoplankton – considered to be a primary producer, phytoplankton are tiny, single-celled, chlorophyll-containing photosynthetic organisms (a lot like plants) that harness the energy from the sun to grow and reproduce naturally in the ocean. They are the primary food for some of the smallest organisms in the ocean, as well as some coral species and other invertebrates. It is also used as a nutritional supplement to bolster the nutritional value of live foods used in aquaculture and is also dosed directly into a reef aquarium to feed corals and other invertebrates. There are many different species of phytoplankton.
Culture – this word can be used as a noun or as a verb. As a verb, culture refers to the act of deliberately meeting the care needs of the phytoplankton for the purposes of growing a concentrated supply for feeding other marine organisms. As a noun, the word refers to a living population of cells being grown out. The individual cells grow out relatively quickly (exponentially) because each cell splits in two. A single cell can create as many as 1000 other cells after only 10 divisions. Since each cell is tiny, a small volume of phytoplankton culture can contain millions of individual cells.
If you want more resources to help Building a Better Saltwater Aquarium, please
Join the Saltwater Aquarium Blog Community–Get the Free Newsletter.

What to read next
If you’re excited about learning how to grow phytoplankton at home, you’ll probably also enjoy these other topics–I know I find each of these things to be as enjoyable as growing a successful phytoplankton garden.
