
Do you long for your own saltwater aquarium set up? Are you worried you’ll end up creating a dynamic display but need to eat ramen for the rest of your life? No worries! You can enjoy the beauty and relaxation of a saltwater tank in your own home WITHOUT breaking the bank. Simply follow the steps in this definitive step-by-step guide, and you’ll find yourself hooked on the hobby in no time flat!
Table of Contents: Saltwater Aquarium Set Up
Saltwater aquarium set up involves plenty of time and thoughtful research. And you probably have plenty of questions. Not to mention, you’re thinking through the LONG list of tasks ahead of you. Don’t worry. This article is written in a helpful, progressive way to get you off on the right foot. But if you have a specific question and see a link below that you think will help? Feel free to jump straight to that topic.
- A Few Questions to Get You Started
- Difficulty Levels For Saltwater Aquarium Set Ups
- All-In-One Aquarium Set Up vs. Build-Your-Own
- Acrylic vs. Glass Tanks
- Aquarium Sump Set Up
- How to Pick the Perfect Location for Your Saltwater Aquarium Set Up
- Equipment and Test Kits
- Saltwater Aquarium Set Up: Step-by-Step Guide
- For More Information
A Few Questions to Get You Started
Before jumping into the set up section, take a moment to reflect on what you want for your saltwater aquarium as well as your starting point. Everyone pictures their dream tank, and you probably picked up some books or perused blogs or message boards to get an idea of the resources you’d need to create that dream. But you need to sit down and set those dreams out on paper. Figuring out the answers to the following questions will help shape the path you’ll need to follow to create that perfect aquarium set up.
What Type of Saltwater Aquarium Set Up Do You Want?
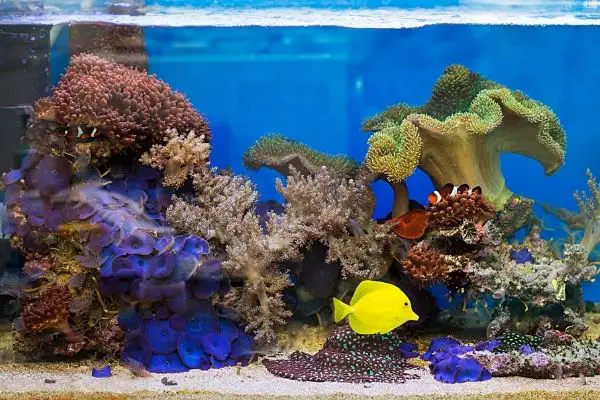
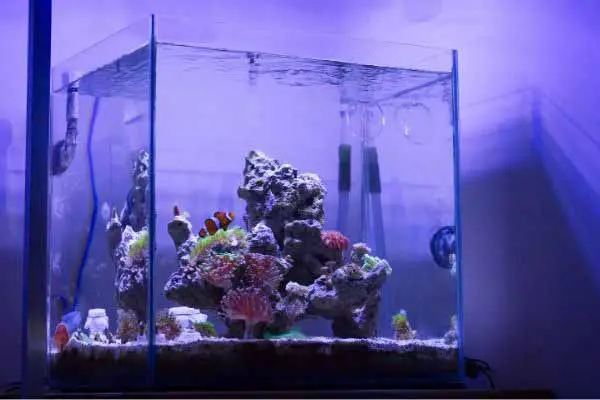
Let’s start with the easiest question. Close your eyes and picture your dream saltwater aquarium. What does it look like? What shape do you envision? Is it large or small? (Let’s set aside those monolithic, wall-spanning tanks for the moment) What’s in it? Are you interested in keeping a reef tank with fish, corals, shrimp, crabs, snails, and clams zipping around (okay, the clams won’t zip, but you get the idea) intricately designed rockwork (called an aquascape)?
Or are you leaning toward a more open design with larger fish swimming about? Maybe you have thoughts of a predator tank, one you can use to demonstrate unique hunting techniques whenever your friends drop by.
If you don’t have that ideal tank in mind, that’s fine. Plenty of people aren’t sure where to go with that idea of a saltwater aquarium set up when they start. But figuring out the type of tank you have in mind WILL impact the aquarium set up. So it’s helpful to think through at least a rough plan before you rush out to buy supplies and start setting up the physical tank. You don’t want to get halfway through your project and realize you have the wrong equipment.
Is There a Certain Look or Style You’re Interested In?
When you envision the perfect saltwater aquarium, what does it look like? Forget the size and shape for a moment, and focus on the display of the tank itself. Is there sand at the bottom, or do you see the glass? Do you have a thin layer of substrate, or is there a deep sand bed? Is it fine sand – the king you find at the beach – or larger, more chunky coral skeleton sand?
Deep sand beds add water quality improvement capability to your tank and create a mini-ecosystem for certain marine life you otherwise wouldn’t have. But many people find them “ugly” compared with other aquarium set ups. A shallower sand bed serves almost no utility but creates a look many people prefer. Then you have bare bottom tanks, which have a clean look that makes them easy to clean and is preferred for tanks with the most demanding corals. Those corals require significant water movement, which would stir up a sandy bottom if you had one. So you can see how an aesthetic decision can end up influenced by a stocking decision.
And that leads to other questions: Do you see corals spread throughout the tank, creating a wall of color? Branching corals? Or those with a more rounded shape? What about sea anemones? Or clams, oysters, scallops, or other mollusks? Is the back covered in live rock? Looking over other saltwater aquarium set ups can provide you with an idea for yours. And talk with hobbyists. Ask them what they did or for pictures of their tanks. You’ll zero in on the style that speaks to you.
How Much Knowledge, Experience, and Confidence Do You Have?
Before you get started, another important factor to consider is to realistically and fairly assess how much knowledge and experience you have regarding keeping fish, plants, and invertebrates alive in an aquarium. (It doesn’t need to be with a saltwater aquarium set up, either) If you already have plenty of experience under your belt (perhaps from a pond or a freshwater aquarium), or if you’ve done your homework, looking into research, you’ll find success in moderate-difficult tank design (we’ll touch on those levels in a moment). You can even take that freshwater knowledge and apply it TO saltwater if you feel up to the task!
If your knowledge level and experience fall in the low rank (for now), don’t worry. You’re not going to fail. You might need to wait on more complicated species or aquarium set ups for a little while – that’s all. But we’ll work together and help you figure out a saltwater aquarium that suits your individual needs.
Difficulty Levels For Saltwater Aquarium Set Ups
Okay, you’ve figured out what kind of tank you’re looking for. You’ve settled on a style and an overall look that appeals to you. And you’ve even done a heart-to-heart and admitted where your knowledge and experience fall on the difficulty scale. Now it’s time to dive into the general difficult levels for saltwater aquarium set ups so you can combine everything together.
Generally, beginner saltwater fish and invertebrates – such as hermit crabs and snails – are considered the least difficult animals to care for in a saltwater aquarium. These hardy creatures are generally considered the easiest to care for, earning the titles of “beginner fish” or “starter fish.” From there, the level of finesse (and pickiness) goes up. You’ll need to break out your knowledge and specialized equipment to handle certain species. And at the tip of the iceberg? You’ll find fish and invertebrates (especially certain corals) that demand attention and precise environments. Those critters aren’t for the faint of heart.
Now, before you despair, keep in mind that the difficulty levels described here are rough-cut. The only absolute in the saltwater aquarium hobby is that there are exceptions to every rule. Not every aquacultured fish are appropriate for beginners. Not all soft or leather corals are easy to care for. And not all LPS and SPS are difficult. Everything in this hobby can be conquered if you educate yourself, plan, and take your time. The levels provide a framework to help you with your saltwater aquarium set up planning.
So let’s look closer at what goes into the aquarium set up for each of these levels.
Beginner
If you find yourself at the beginner level, the most practical place to start is with a fish-only tank (FO), a fish-only with live rock (FOWLR), or a FOWLR with a clean-up crew. Why? Because corals are complicated. Sticking to the less demanding (for the most part) creatures out there will allow you to get your saltwater aquarium set up and running smoothly before you move on to anything more complicated. That doesn’t mean that EVERY fish, crab, or snail is easier than corals to care for. It simply means that (in my opinion) they’re easier than almost any coral.
You just want to think carefully through those fish choices:
Generally speaking, the easiest fish to buy and care for are those born in captivity (called aquaculture). These fish have lived their lives in reef tanks and are best suited to life in your home aquarium.
Snails and crabs work for a new saltwater aquarium set up. They’re fun to watch and practical. They help clean up the tank and are often part of something called a clean-up crew. Great snails to start with are the cerith snail or turbo snail. Other snails are hardy and easy to add but perhaps not as useful as these two species.
Beware of keeping blue-legged hermit crabs and cerith snails together. On the surface, they seem compatible, but keep in mind that hermit crabs need fresh shells to grow into. They might evict a snail from their home to upgrade.
Moderate
For those starting at a moderate level (or anyone ready to level up), consider testing your skills with a reef tank setup. This means you can include beginner-to-moderate saltwater fish and beginner soft corals. You can start adding mushroom corals, leather corals, and certain zoanthids to create a more vibrant appearance to your saltwater aquarium set up. And, as you noticed in that quick blip, you can also broaden your search beyond aquaculture-bred fish and start considering some of the more popular wild-caught fish available.
Fish imported from their native reefs tend to come with more delicate sensibilities. Not to mention bringing along plenty of natural parasites and pathogens for the ride. A quarantine tank is a MUST when you venture into this level of the hobby. And if you’re not careful with your screening and monitoring, you’ll end up wiping out the fish you worked so hard to source and bring home. That extra work is why beginners should take the time to grow comfortable FIRST before working up to this point.
Advanced
By the time you reach the advanced level, caring for your saltwater aquarium often becomes more about growing the most demanding SPS and LPS coral species than it does about caring for your fish. This is because the most demanding corals have strict light, water quality, and food requirements. A difficult saltwater aquarium set up involves rigid water testing, dosing, to say nothing of the work involved when you get into fragging. There’s no doubt they’re beautiful displays, but you’ll spend the majority of your free time with your tank.
I’ll also put jar-reefing, pico-type aquariums, and even certain biotope aquariums into the advanced category. They require advanced knowledge and planning to ensure success. If you relish a challenge, though, and have the experience to pull these specialized aquariums off, go to it.

All-in-One Aquarium Set Up vs. Build-Your-Own
Know where your difficulty level falls? (Or at least where you feel the most comfortable?) Good. Now it’s time to decide how to proceed with your purchasing. And the first important decision you’ll make as part of your plan for your saltwater aquarium setup is to decide whether or not you want to purchase an all-in-one kit or build your own aquarium by purchasing your tank and equipment separately. There’s no “right” or “wrong” answer here. The solution that works for you is the one that gets you on that road to success.
But let’s compare the two, so you have a better idea of what you’re getting yourself in for.
All-in-One Aquarium Set Up
Buying an all-in-one aquarium kit is the easiest way to get started. Rather than picking up individual pieces of equipment, you get one handy package that contains everything you’ll need for your saltwater aquarium (minus the water). The all-in-one option’s popular with beginners, especially if they’re unfamiliar with brands. Purists? They want to customize their set ups. You’ll need to make a choice based on your personality and resources.
Popular all-in-one aquarium brands include JBJ Nano Cubes and Coralife BioCubes. You can find them at your local fish store, online at Amazon, or at any specialty online aquarium store. If you’re interested in learning more about these options, the manufacturer sites are your best option:
However, if you’re ready to make your purchase, check out the prices on Amazon first. You’ll get a better deal than your will from the manufacturer. (No slight against them, but I like saving everyone as many pennies as possible) If you decide to buy, by clicking that affiliate link, I WILL get credit for the referral and earn a small commission at no additional cost to you. No pressure, just want to be clear that there is the potential for a financial benefit for me here.
What I feel is most important is that you do your research and buy from a place you know and trust. Support the companies you believe in. If that’s your local fish store, buy there. If you choose to use this (or any affiliate link on my site), THANK YOU! (Sorry for the digression. Let’s get back to the information)

The disadvantages of the all-in-one aquarium set ups are the fact they’re generally smaller and less customizable. They’re designed to be attractive, self-contained units. And customizing, adding sumps, or other equipment or automation can get challenging. This makes them great for a first-time saltwater aquarium but not great as a lasting saltwater tank.
Build-Your-Own Aquarium Set Ups
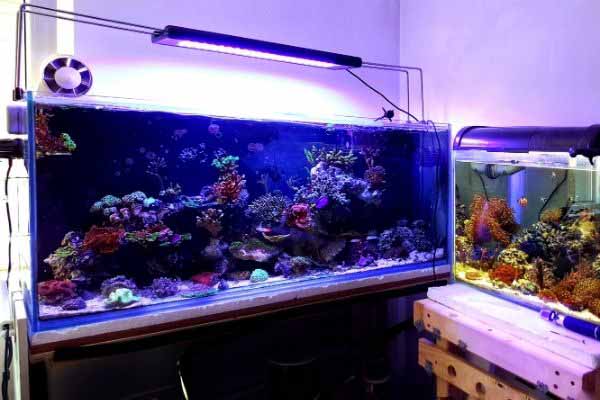
As you might guess, building your own aquarium provides you with the greatest flexibility and lets you create exactly what you want and need. This requires that you have a more adventurous spirit, do a bit more reading and planning, and definitely involves more manual labor. You’ll need to write a list of EVERYTHING you’ll need and keep track of the parts and pieces you’ve collected before you can start to assemble your aquarium. It’s more time-intensive than opening a box, but you’ll get to pick out precisely the equipment you want.
Those who enjoy this approach to saltwater aquarium set up are generally (but not always!) mechanically inclined and enjoy having the latest and coolest technologies. Their enjoyment in the hobby comes from equal parts between the living things in the tank and the design/gear involved. Because building your own aquarium requires you to work on your tank, you admire it that much more.
Acrylic vs. Glass Tanks
What material do you want your saltwater aquarium set up made from? You get two big choices (for the most part, anyway):
- Acrylic (a type of plastic)
- Glass
Acrylic is MUCH more lightweight than glass. That’s helpful to keep in mind if you know you’re going to move in a year or two (or might want to relocate your tank at some point). Acrylic is also a more versatile construction material. You will often see acrylic as the material used in the more modern all-in-one aquarium set ups.
But acrylic scratches more easily than glass, but you can actually buff out the scratches. Scratches in glass are permanent. However, to buff out the scratches in an acrylic tank, you must empty it and do some hard work. So it’s important to weigh the pros and cons of each material before you buy your aquarium.
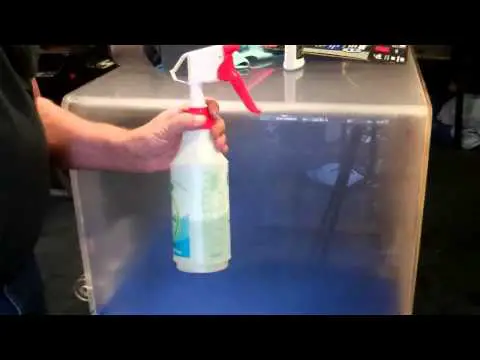
For the record, I recommend either one. If you want to save money or get a bigger tank than you anticipated, try to find a used, scratched-up acrylic tank and repair it. If you’re willing to put the time in, you can get it looking good as new. The YouTube video below will walk you through the amount of work you can expect in your future (and help you decide if it’s worth the investment on your part). You’ll need an acrylic repair kit to complete the repairs yourself.
If you don’t have a strong opinion either way (like me), note which designs you prefer and go with them.
Aquarium Sump Set Up
Another important thing to consider is whether you will have an aquarium sump set up underneath your tank. This is a specialized tank you keep under your display aquarium that adds additional volume to the tank, partners with a large return pump that oxygenates and provides water flow, and provides a place to add your protein skimmer, heater, and refugium. The basic premise and design are as follows:
- A small pipe, called an overflow, sends water into one end of the sump.
- A filter sock then catches debris and provides mechanical filtration.
- The water then travels through a protein skimmer, where organic materials and other solids not caught by the sock get removed.
- The water is heated by the heater and travels through a refugium, which is an area where macroalgae and invertebrates are deliberately cultivated to help purify the water by removing nitrates and phosphates.
- Finally, the water flows through series of baffles, which trap any remaining detritus and microbubbles.
- A return pump sends the water back up into the display. The extra water returning to the tank causes the water level to rise above the overflow pipe (see how it gets its name?), and the cycle continues.
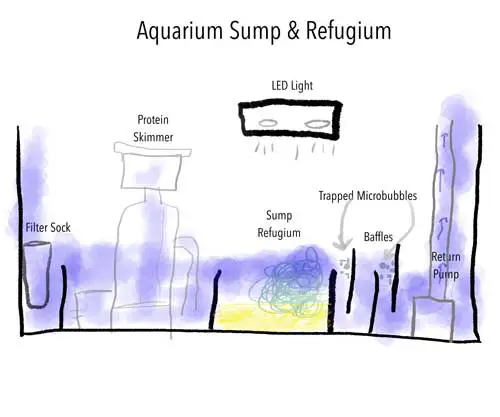
The sketch represents an upper-middle-of-the-road sump design. If you have an advanced aquarium set up, you could add UV sterilization, a calcium reactor, phosphate reactor, chiller, and an auto top off (to replace evaporation). They’re great options, but more advanced than this introduction allows for.
You can also keep an aquarium sump that acts as a big reservoir without the differentiated sections. You’ll simply have the water drain into one area and pump out the other. That’s one of the many awesome aspects of this hobby: You can start low tech and upgrade as your interests, budget, and time allow.
How to Pick the Perfect Location For Your Saltwater Aquarium Set Up
Picking the location of your new saltwater aquarium set up may seem like a trivial decision, but it actually ranks near the top (you know, once you have your equipment). Selecting the wrong location can cause big problems down the road. So take a few minutes before you start assembling things to select the ideal spot. And if you’re not sure? Six criteria will help you narrow down an ideal location for your saltwater tank:
- The floor can support the weight
- Nearby “stuff” won’t end up ruined if wet or salty
- Easily accessible
- Visible (hopefully that’s an obvious one)
- Not prone to major hot or cold temperature changes
- Well-ventilated
1. The Floor Can Support the Weight
One of the most vital issues regarding location is the floor’s ability to support the tank, the water, and everything associated with the life support of the fish and invertebrates inside. Your new saltwater aquarium set up is going to be HEAVY. A 20-gallon aquarium (75L) weighs over 200 pounds (90.7kg). A 92-gallon (378L) corner aquarium weighs more than 1050 pounds (476kg). That’s a significant burden to place on your floors.
There’s a good chance your dream aquarium will end up as the heaviest thing in your house.
You don’t want your saltwater tank falling through the floor, off the shelf, or breaking the stand. So it is CRUCIAL to place the tank in a location that can handle the weight. If you aren’t sure how heavy the tank you plan to buy will end up, you’ll find handy reference tables that can provide you with guidance.
2. Nearby “Stuff” Won’t End Up Ruined If Wet or Salty
The area (mostly the floor, but you can’t forget the walls) surrounding your saltwater aquarium set up WILL get wet. Salt creep can end up on tables, walls, or floors. And when you slog around buckets of water for water changes, you’ll drop even more water. It’s an inevitable part of the hobby. And it’s why you need to think about the location of that tank carefully.
If you have brand new hardwood floors made from rare Brazilian rainforest wood that warps the first time it gets wet, you probably don’t want to put your tank anywhere nearby. I recommend you think it through to make sure you’re not disappointed later. Water has a habit of splashing and dripping. And where that water goes? Salt’s going to follow. You want to think about what you have within the splash zone – and whether you WANT a splash zone placed there.
3. Easily Accessible
You need to be able to reach into your saltwater aquarium set up to clean the glass, provide food to your fish, arrange rockwork, basically do ANYTHING. And if you have plumbing running behind or below the tank, you need to get in there. A gorgeous tank in the most awkward spot in the house does you no good. It won’t stay pristine and beautiful for long if you need to limbo or contort yourself to reach into the tank. So make sure you place your aquarium somewhere you can access everything you need.
And don’t think you only need to reach the front of your set up. You never know when you might need to check a connection, replace live rock along the back wall, or hunt down unwanted pests. You should be able to get to at least two if not three sides of your aquarium.
4. Visible
You want to enjoy your aquarium, right? After all, that’s why you’re getting into the hobby (hopefully, anyway). Pick a location where your tank will be visible, and you can enjoy it. You’re putting A LOT of work into that saltwater aquarium set up, and you deserve to bask in a job well done.
Just remember that it WILL give off light and make noise. So the best spot may or may not be in the room where you watch television or record your audio podcast. And as soothing as fish tanks are, you probably don’t want one in your bedroom. The bubbling of the pumps may do wonders as a white noise machine, but the lights can interfere with your body’s circadian rhythms. Choose a location that works with your schedule and lifestyle.
5. Not Prone to Major Hot or Cold Temperature Changes
Everyone has that one room in the house that always heats up or freezes in the winter. Maybe you have one where the sunlight blazes and bakes everything with natural radiation. You don’t want to put your aquarium set ups in any of these options. The temperature fluctuations will wreak havoc on the environment within the tank – even if you have a heater or chiller struggling to maintain a status quo.
You’ve probably heard a common myth that placing your tank next to a window will cause major algae outbreaks. I don’t necessarily agree with that in most cases for saltwater aquarium set ups. But I DO think you should determine if the window will turn into a major source of heat loss or heat gain for your tank. If you have drafty windows or the sun heats up a room in your house (above the ~78F/25.5C you want for your tank ), you want to set it up somewhere else.
I have my tanks next to a window in my house and haven’t found any issues with heat or extra light (to say nothing of algae). But your situation may be different depending on how warm or cold your room gets due to direct sunlight.
6. Well-Ventilated
Water evaporates out of your tank into the air in the room. This will increase the humidity. So if you need dry air to sleep (or it’s better for your breathing situation, based on various health issues), you wouldn’t want to put the aquarium in your bedroom. (Never mind that we already addressed the lighting and noise factor for the bedroom) And the same rule applies to ANYWHERE you don’t want to cope with extra moisture.
A few years back, I set up a rack of tanks in my basement. It was pretty awesome and pretty terrible at the same time. Awesome because I got to keep different tanks and watch the pairing-up and spawning behavior of my fish. Terrible because it made my basement incredibly humid and damp. There was so much humidity down there, stuff started to RUST. (Ugh)
Even if you decide it’s not too bad that the humidity builds up, you’ll find that smaller, less ventilated rooms are more likely to smell like fish. So the perfect location for your tank is in a well-ventilated room. This allows that extra moisture to dissipate, taking the smell of fish with it. You won’t get an overload of humidity, decreasing the risk of dampness and potential damage to the equipment and objects in the room.
Equipment and Test Kits
In addition to the saltwater aquarium itself, you’re going to need equipment to keep everything running and ensure the animals and plants in your tank remain happy and healthy. Even if you spring for the all-in-one option, you’ll still need to add these to your aquarium set up list (they’re not standard). And you’ll find them as necessities for EVERY level of hobbyist. These crucial pieces allow you to set up a maintenance schedule for your tank. And in no time, you’ll see your tank flourishing (or they’ll help you narrow down a problem).
At a minimum, you want to make sure you have all of the following equipment ready to go (before you set up that tank):
- Lighting
- Powerheads for water movement
- Temperature control (heater and/or chiller)
- Maintenance gear (gravel vacuum and bucket)
- Test kits
There are about 12 primary water parameters that are key to keeping a happy, healthy reef tank: nine are considered essential for every tank, while the remaining three are for troubleshooting more complex problems.

Saltwater Aquarium Set Up: Step-by-Step Guide
Whew! You’ve picked out the perfect tank and equipment, decided on the animals you want to care for, and selected the perfect location for that display. Now it’s time to roll up your sleeves and work through the entire reason you stuck through this guide: the saltwater aquarium set up! We’ll take everything one step at a time. And by lucky 13? You can kick back, relax, and admire your hard work and beautiful display tank.
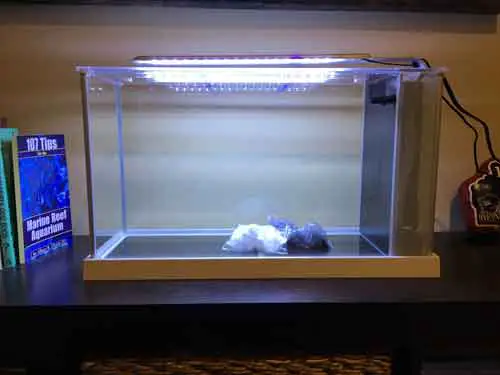
Step 1: Test the Tank for Leaks
The first step in your saltwater aquarium set up is to test the tank for leaks. Oh, sure, it sounds obvious. And maybe you purchased a brand new tank or an all-in-one kit. It doesn’t matter. As you can see in this YouTube video, it doesn’t take much for a simple oversight to turn into a complete disaster. Don’t let this be your house; check your tank.

Before putting your tank in the perfect location, make sure it will hold up its end of the bargain.
How to test your saltwater aquarium for leaks
- Set up your tank somewhere it would cause minimal damage if it makes a big mess. A driveway, backyard, or even a parking spot you can reach with a hose works best. If you don’t have one of those options, think about a room in your house, apartment, flat, or condo where you can soak up a wet mess easily. That might be a bathroom, kitchen, laundry room, garage, mudroom, or basement. You want somewhere level that can support the weight and easily get cleaned up if the tank DOES spring a leak.
- Fill your tank with fresh water. Don’t worry about mixing salt. You’re just trying to make sure the tank won’t make a mess on your floor.
- Dry the outside of the tank with a towel. You want to get all the drips and any water pooling around the edges and molding. Do your best to make sure the only water you see is the water inside the tank. After this step, you only want to find any water OUTSIDE of the tank.
- Mark the water level on the outside of the tank with an erasable marker or piece of tape
- Leave the tank for a day or two and check it periodically. Has the water level stayed roughly the same? (You will have some evaporation, but you shouldn’t notice any drastic changes in the water level) Do you see water droplets beading up around the outside corners or seams of the tank? Do you see any leaks or puddles? If not, you’re in good shape and ready to move on.
This might sound like a waste of time. And, statistically speaking, it probably WILL waste your time. A new aquarium shouldn’t leak. But keep in mind that these are fragile pieces of glass or acrylic held together with silicone and plastic. They get stressed during transportation, and they certainly get stressed by any drilling done for plumbing.
It’s better to be safe than sorry here. I sincerely hope I wasted your time. Because it means your tank isn’t leaking.
And if I didn’t waste your time, and your saltwater aquarium DOES have a leak? Then I’m glad you found it outside or in your garage, rather than in your living space or the middle of the restaurant, like in the video.

Step 2: Move the Tank to the Chosen Location
Once you’re sure the tank doesn’t leak, it’s safe to move it into your living space. You already read through the considerations for location for aquarium set up, so you have the space selected and cleared, ready for the tank. If you purchased a stand, have it assembled and in place. You’ll also want all of your additional equipment close by. (Nothing worse than trekking back and forth through the house as you’re working) Give yourself room to work, though. You don’t want to CREATE a leak by accidentally stepping on or kicking the tank now that you checked it.
Step 3: Level the Aquarium
You put the tank on a flat surface and tested it for leaks. This confirms that your tank doesn’t leak on a flat surface. But that doesn’t mean your tank won’t ever leak. Unfortunately, established tanks leak, too. And the culprit is usually stress.
For me, stress comes from deadlines at work, bills, family, that sort of thing. For your saltwater aquarium set up, stress comes from uneven pressure on a seam. Aquariums are engineered to use the weight and outward pressure from the water to create even stress on the walls. If your tank isn’t level, you won’t be able to fill the tank all the way without it spilling out on one side. This leads to extra pressure on one side than the other. This will stress that seam and cause it to fail over time.
So when you set up your saltwater aquarium in its final location, you need to check that it’s level. You do this with a tool that is also called a level (convenient, no?).

If you don’t own a level, you can find one at any hardware store in the world, or you can buy one online. My affiliate link leads to an inexpensive torpedo level if you want to add it to your shopping cart.
Step 4: Place Your Substrate
Now, it is time to add your substrate, a fancy aquarium nerd word for the material (usually sand or crushed coral) in the bottom of the tank. Your choice of substrate is based on aesthetics and functionality. And you’ll want to take both of those into consideration when you settle on the type that works best for you. (We touched on this when we discussed the look of your aquarium set up)
Aesthetics of Aquarium Substrate
You already know what you want your aquarium set up’s going to look like. But take a moment to close your eyes and imagine your saltwater aquarium one year from now. What does it look like? Is it filled with hard corals? Soft corals? Swirling with popular saltwater fish? What do you see at the bottom of the tank? Do you want a layer of white sand or exotic colored sand? Or perhaps you prefer the look of crushed corals and shells? Maybe you even want a bare-bottomed tank. The choice is yours.
First and foremost, it is a choice of personal preference and aesthetics or the look you have in mind. This will be your masterpiece, so go with the substrate that creates the image you have in your head. If you can think of it, you’ll find it. And once you have the idea, you can move on to the practical part of the equation.
Functionality of Aquarium Substrate
Yes, you know how you want your substrate to LOOK. But there are some practical, functional considerations associated with the substrate you choose. Whether you pick coarse or fine sand, each grain of sand or crushed coral crag has surfaces that bacteria will grow on. Those bacteria create the base of your biological filter and actually help make your saltwater aquarium set up an appropriate habitat for the creatures in your tank. The bacteria that live at the top of your sand bed (and every other wet surface in your aquarium) convert the toxic chemical ammonia into nitrite and then eventually nitrate. That means you’re helping out your tank, no matter WHAT type of substrate you choose.
You will also notice tiny creatures (copepods, amphipods, bristle worms, and other fun critters) will take up residence in your substrate. Really cool stuff.
However, it’s noteworthy to point out that coarse sand and crushed coral substrates can be a little dirtier than fine sands. That’s because food and waste particles fit into the nooks and crannies. If you don’t vacuum the waste regularly, it will slowly pollute your tank and cause your nitrates to rise. It’s not the end of the world and not something to worry excessively about.
That cleanliness factor is one of the major reasons many people decide on a bare bottom tank, though. Any extra food or waste is easily identified and removed.
Deep Sand Beds
If you have a tall tank, you may want to consider creating a deep sand bed (sometimes abbreviated DSB in online saltwater aquarium forums like Reef Central). In addition to creating a great place for bacteria and copepods and other critters to grow, a deep sand bed also creates somewhere for anaerobic bacteria to grow.

Anaerobic bacteria live without oxygen. Deep in the sand bed (see where the name comes from?), these bacteria remove nitrate from the reef system, shifting the waste from the tank. DSBs are not all roses, though. (In fact, they smell more like rotten eggs if you stir them up) But they can be a fun and functional option for your substrate.
Washing Your Substrate
Believe it or not, sand is dirty (I know, it’s a shocker). Unless you purchased an ultra-premium brand of mega-washed sand (how is that for a marketing claim), you’ll want to take the time to wash your sand before placing it in your aquarium. If you don’t (and even if you do), your tank will turn cloudy for the first few days while the dust-sized particles (stirred up by the water) settle out. You can get some of those particles out in advance by washing the sand thoroughly. This will make you a happier saltwater aquarium owner.
The exemption is for live sand. So let’s move on to that topic next.
Dry Sand or Live Sand, Too?
Plenty of hobbyists choose to stick to dry sand. In other words, the sand you associate with beaches and playgrounds. But you’ll want to consider whether you want to add any biologically active live sand to your aquarium set up. There are plenty of varieties of live sand, all available in colors and sizes to match your taste and the design of your tank. (So you’re not missing out on the look you devised in the beginning)
The advantage of live sand is that it comes wet and biologically active, meaning it’s already colonized by millions of bacteria. So you can either shorten the amount of time it takes for you to cycle your tank or possibly even eliminate it altogether.

Dry sand, on the other hand, is biologically inactive and requires that washing before you add it to your tank. But it costs less than live sand. If you’re fretting about the bonus of having all of that beneficial bacteria in your aquarium set up, but you don’t have the funds to cover the bottom of your tank in live sand, take a breather. Bacteria and sand go hand-in-hand. After some time in your saltwater aquarium, bacteria will grow on dry sand, too. This converts it to the more expensive live sand (without, you know, paying the added expense).
And if you want to give your biological filter a boost with live sand, you don’t have to fill the bottom of your tank exclusively with live sand. Add a base of dry sand, and then add a bag or two of the live sand to top it off.
If you ARE starting with live sand, be sure to add enough newly mixed saltwater to your aquarium to keep the sand moist before moving to the next step. If you don’t, the bacterial organisms will start to die out.
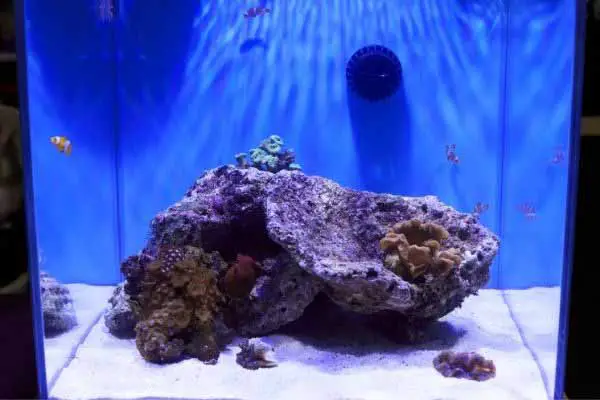
Step 5: Add and Arrange Rock-Work
Once you’ve poured your sand or crushed coral substrate into the aquarium, you can move on to the rock-work. Two of the most common types of rock mentioned in the saltwater aquarium hobby are:
- Dry rock
- Live rock

Dry Rock
The term “dry rock” refers to two elements. The first (and most obvious) is that this type of rock is sold dry. The second, perhaps less obvious, is that this type of rock isn’t colonized with helpful bacteria or interesting invertebrates. It’s just a dry chunk of the earth. (Or it can be the dried remains of coral skeletons. As long as it’s an inert piece of calcium, it counts)
Dry rock is the kind of rock you buy “off-the-shelf” in your local fish store. It’s typically sold by the pound but comes in MUCH less expensive than live rock. Because of the potential cost savings, many saltwater aquarium hobbyists buy dry rock to use as the foundation of the rock-work for their saltwater aquarium set up.
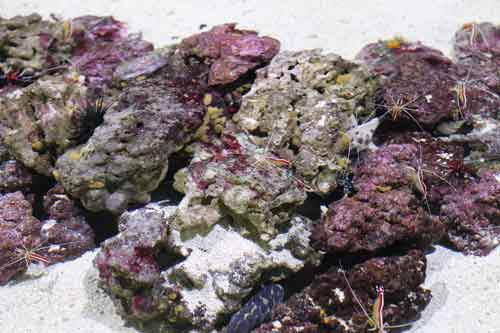
 Live Rock

Live rock, by comparison, is a lightweight rock that contains bacteria, algae, and invertebrates on and within the various holes, crevices, and surfaces. Live rock comes in the same by-the-pound sales but is several times more expensive than dry rock.
As such, many people choose to use “live rock” more sparingly, opting to save it for the most visible areas and to cover up the less desirable dry rock. Over time, you can achieve a degree of reef alchemy. Any rock (including dry rock) submerged in a saltwater aquarium will become live rock once it’s colonized with bacteria, algae, and invertebrates. So if you’re willing to take the time with your aquarium set up, you can achieve that classic reef look.
Step 6: Mix Your Saltwater
Now that your “dry” components are all in place, it’s time to mix up your saltwater and get it into the tank. Ideally, it’s best to mix your saltwater at least a day before you plan to use it. But since this is your first time at an aquarium set up, I’ll give you a pass. (Also, you probably don’t own enough salt buckets yet to make that work) For now, mix up a bucket, lug it over to your aquarium and fill ‘er up.

Don’t worry too much about what salt mix brand to purchase. Once you get into the hobby, you’ll find the one that works best for you.
How to Mix Saltwater
If you’ve never mixed your own saltwater before, and you want to know what’s involved in the process, this short YouTube video will walk you through everything. (Trust me, they make this look more difficult than it actually is)

Yes, you need to stir up the water until the water clears. Yes, you should heat it and leave it to settle overnight. All of this falls under best practice. And you should do everything on an ongoing basis. But to get started, you just need to measure out the right size scoop, drop it in the bucket, fill it with water to the line, and stir.
One quick note of caution: If you ARE mixing up your water and placing it directly in your saltwater aquarium setup, you run the risk of shocking the living stuff on your live rock. So if you have expensive, killer live rock with awesome stuff growing on it (and you’re worried about losing it), spend a little more time and let your water rest (and stabilize) overnight before adding it to your aquarium.
I’m making an assumption here, however, that the extra caution is unwarranted in most cases. Use your judgment on your saltwater aquarium set up. But if you have the time and self-restraint to wait a day, that would be the best approach.
Step 7: Place Your Powerheads
Having insufficient water flow is one of the top five most common saltwater aquarium mistakes. I wrote about it in an e-Book: Avoid the 5 MOST COMMON Saltwater Aquarium Mistakes. You can get a free copy by joining my newsletter community. (Want your own copy? Sign up here)

In the meantime, here is the short version of why you need great water flow in your tank: Flowing water is the life-blood of an aquarium. It carries oxygen and food to corals that can’t move and removes waste and carbon dioxide. A thriving, vibrant reef needs vigorous water flow.
Think of a stagnant pond; what image comes to mind? Are you picturing a pond scum-infested body of water? In some ways, that’s what can happen to your tank if you don’t have enough water flow. Problem algae gain a foothold in low-oxygen areas and end up the start of BIG problems.
Back to the powerheads: Powerheads are a great, inexpensive way to generate a lot of water flow in your tank.
Step 8: Place Your Heater
If you own a saltwater aquarium with a sump, you probably want to place the heater there, so it can run and heat the water out of view. If you don’t have a sump (that’s fine, you don’t need one), you can place your aquarium heater anywhere you want, as long as it sits below the water level. It’s best to give yourself at least an inch or two below the water level so that it remains submerged – even with a fair amount of evaporation.

The heater isn’t the most attractive piece of equipment for a saltwater aquarium set up. Most people prefer not to see it. As such, the best location for the heater (if you don’t have a sump) is to slide it down the back of the tank, preferably behind some live rock. Just be sure there’s enough open space to ensure proper water circulation. That way, you can be sure you are efficiently heating your tank.
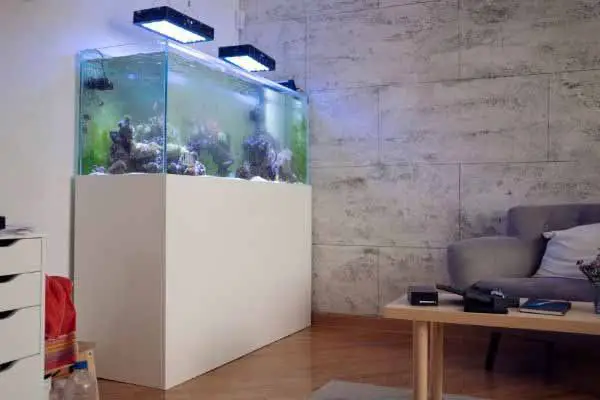
Step 9: Install Your Lights
People used to debate in online forums about the best lighting sources for a reef tank. There were more options back then: metal halide, VHO, HO, and power compact. These lights are still available today, but now it seems that LED aquarium lights rule the day. Long-lasting (they never seem to last as long as advertised, in my experience), energy-efficient, and cool-running, these lights tend to be the right tool for the job, most of the time.
If you don’t want to shell out the dough for a big-name brand, consider getting a discount brand online. I encourage you to read the reviews and pick a model that seems to have a good success rate from verified purchasers.

If your lights don’t have a timer built into them, buy one online. Set the light period to provide around 10-12 hours of light each day. You can scale that back a bit if you want to conserve energy, but 10-12 hours is the right amount to maximize coral growth. If your light comes with different switches for white vs. blue light, many people set the blue lights to come on for an hour or two before the white lights and for an hour or two after the white lights shut off. This helps mimic the natural pattern of daylight.
You should also consider dimming your lights before adding your first few corals. Then you can gradually increase the intensity once you’re sure they’re adapting nicely to life in your aquarium set up. Failure to do so could result in stressed (dying) corals.
Congratulations! After your lights go in, you have a saltwater aquarium set up!
Step 10: Set Up Remaining Equipment
At this point, you have a functioning saltwater aquarium. True, it’s a minimal aquarium set up, but it’ll work to support life. You can find plenty of additional gear to help you automate and improve the water quality, but everything else (from my perspective) is optional equipment.

Protein skimmers, refugia, wavemakers, chillers (in most locations), dosing pumps, UV sterilizers, reactors, and other equipment are helpful pieces of equipment that help you build a better tank, but they’re not strictly necessary. They’re also not the most difficult equipment to install. For the most part, all you need to do is plug them in and turn them on. Make sure you use a drip loop with your electrical wires for safety!
Depending on the size of your saltwater aquarium set up, your electric company should send out a rep to thank you personally. If you want to see how much electricity your tank takes to run, pick up this little contraption called Kill A Watt. Plug your aquarium equipment into the same surge protector/power strip and then plug that into the Kill A Watt and find out how much electricity you really use. Once you do that, you’ll start plugging everything into it just to see. These are not expensive and pay for themselves if you use them to find other energy-inefficient items around your house. (I was amazed at how much electricity an old TV was sucking up. Yikes!!)
Step 11: Cycle the Tank
If you are new to the hobby, this might sound a bit strange: The next thing you have to do BEFORE you add any fish or corals is cycling the aquarium.
The biggest challenge when keeping an aquarium is maintaining the water parameters in the healthy range for the living things you keep in the tank. In the ocean, currents take away waste and bring oxygen and food-rich water right up to the corals. But your aquarium is a big glass or acrylic bucket. No waste gets removed unless you remove it (generally with water changes).
The biggest danger when you first tackle an aquarium set up is a chemical called ammonia – a waste product created by rotting, leftover food, and waste expelled by the fish, corals, clams, crabs, snails, shrimp, etc.

The good news is naturally occurring bacteria will grow in your tank and convert that waste to a less toxic chemical called nitrate. Nitrate will cause problems when it builds up, too, but it’s not immediately toxic the way ammonia is. These beneficial bacteria make up something called your biological filter. Establishing your biological filter is a process called cycling.
Adding a live rock, live sand, or a bacteria additive can help you speed up the cycling process.
Step 12: Set Up a Quarantine Tank
Now, I know what you’re thinking. You just got 90% of the way through an article about saltwater aquarium set up, and I told you to set up a SECOND aquarium before you add your first fish! Here’s why: One of the biggest, preventable reasons people shut down their tanks forever is because they run into issues with saltwater ich or another parasite, get a major infestation in their tanks, and lose everything. When that happens, it’s a frustrating, expensive, dark day, and it happens more than it should.
A quarantine tank is the best way to prevent pests and diseases from getting into your aquarium set up in the first place. A quarantine tank is a smaller, simple tank used to isolate, observe, and treat (if necessary) any fish before you add them to your tank. This gives you a safe location to identify and treat those pests before adding them to your display. It’s also the best place to identify potential live rock hitchhikers – before they set up camp in your aquarium.
Step 13: Pick Your First Saltwater Fish
Congratulations, you’re ready to pick your first saltwater fish to add to your aquarium set up! Starter fish should be hardy (adapts well to aquarium conditions in your home), inexpensive, and peaceful towards other tankmates. Ideally, your first fish will be aquaculture, as mentioned in the difficulty levels above. That means they grew up on a fish farm rather than in the ocean. In addition to being better for the natural reefs, aquacultured fish tend to better acclimate to life inside our homes.
You’ll find the best fish resources and care guides on the Saltwater Aquarium Fish Page. And if you want some additional help? How about these handy tips:
- A List of the 20 Most Popular Saltwater Fish
- Acclimating Fish Using the Drip Method
- Watch out for the very popular and occasionally troublesome six line wrasse
For More Information
Saltwater aquarium set up involves plenty of steps, work, and planning. And if you’re looking for that little bit extra (as if all of the links you’ve encountered to this point haven’t done enough), you can find a little bit extra tucked away right here.
This YouTube video will walk you through a simple saltwater aquarium set up:
Conclusion
Thanks for reading (or scanning) to the bottom of this guide on saltwater aquarium set up! I hope you found it helpful. I won’t deny that this is a LENGTHY article. But I wanted to touch on all of the aspects of this hobby – well, the first few steps of the process, anyway. Once you get the hang of things? You’ll find an entire WORLD opening up and waiting for you to dive in and explore.
I’ll just give you one final warning: This hobby is ADDICTIVE. Once you get started with that initial tank, you’ll need another, and another, and ANOTHER. Before long, you’ll have an entire basement covered with tanks, you’ll end up writing articles for magazines, publishing books, and then you’ll have your own blog where you’ll send out tips and tricks for other aspiring aquarists to devour. It’s a slippery slope (but one I recommend).
If you feel there’s an intro topic that wasn’t covered in this aquarium set up, please leave a comment below. You can also ask questions or leave your advice/recommendations: I welcome the help!
If you found this article helpful, there are plenty more where it came from. Enter your name and email address in the fields below, and I’ll send you a free eBook to help you avoid some of the most common aquarium mistakes!
What else to read next
After reading this guide how to set up a saltwater aquarium, you may also want explore some of these other popular topics:
- Vodka dosing in a reef tank
- Don’t stop at saltwater fish– Learn about saltwater cleaner shrimp
- Learn more about caring for aquarium corals

Leave a Reply